Wednesday, November 23, 2011

Vegan pumpkin pie brownie

Misha and Nika have a pillow fight.
Ever since these two were added to our menagerie, there has never been a dull moment. In fact, I can safely say I never sit around for very long. I'm sure I am following the new guidelines of never sitting for more than 30 minutes at a stretch. I'm usually grabbing a leash to head outside for a walk, romp or something. I'm not advocating getting a pair like this to keep you moving but it definitely works unless you want your house in shambles.

Nika tries to snatch a muffin.
Even your breakfast might get snatched if you are not vigilant as my husband found out while checking his e-mails.


Child's pose with help

 I turn to yoga to try to destress from all this doggie activity but even that is not canine-free.


Too much yoga help

Yoga is not always relaxing. This is where the dynamic duo get sent outside to their pen.


Bailey and Kona do the relaxation pose.


Why can't the other two be more like these guys? The look so relaxed I wish I could join them.


Vegan pumpkin pie brownie


Amidst all the doggie activity, I still had time to experiment with a recipe for Thanksgiving. I've never been a fan of pumpkin pie which my hubby dearly loves. It's got to have a chocolate or what is the point of consuming the extra calories in my book. I thought why not combine my favorite with his and Vegan Pumpkin Pie Brownie was born.

Vegan Pumpkin Pie Brownie

Ingredients for Brownie Layer:
  1. 2/3 cup cacao powder
  2. 1/2 cup amaranth flour
  3. 1/4 tsp. baking powder
  4. 1/4 tsp. salt
  5. 1/4 cup coconut sugar plus stevia to taste
  6. 1 cup pumpkin puree
  7. 1/4 cup olive oil
  8. 1/4 tsp. baking soda
  9. 1 flax egg (1 T. flax mixed with 3 T. hemp milk)
Ingredients for Pumpkin Layer:
  1. 1 cup pumpkin puree
  2. 1 T. flax
  3. 1/2 cup non-dairy milk, such as hemp
  4. 1/4 cup coconut sugar plus stevia to taste
  5. 1/4 tsp each cloves, nutmeg and cinnamon
  6. Optional: cacao nibs for garnish
Directions:
  1. Preheat oven to 350 degrees. Spray an eight-inch square pan.
  2. Make the pumpkin layer first by mixing all the pumpkin layer ingredients in a food processor. Pour the mixture into a small bowl and set aside.
  3. Don't bother rinsing out the food processor before moving onto the brownie layer. Mix all the brownie layer ingredients in the food processor.
  4. Pour the brownie layer mixture into your prepared baking pan. Pour the pumpkin layer on top and smooth it out to the sides.
  5. Bake for 30+ minutes until the pumpkin layer looks firm and has cracked at the edges.
  6. Let cool before decorating with cacao nibs or chocolate drizzle.

Misha takes a break but not for long.


Hope you have a happy Thanksgiving and try to enjoy some relaxation time, just like Misha, above.

This recipe is entered in Weekend Wellness at: http://www.dietdessertndogs.com/2011/11/24/wellness-weekend-november-24-28-2011/

Friday, November 18, 2011

Vegan chocolate kiss, cookie dough cookies

Misha underfoot

Kona blocking door

Misha and Kona blocking yet another door
 I guess you can see from the pix above why one of the No. 1 accidents around the house is from tripping over a dog or dogs. So far, no injuries have occurred in our household, probably because this has been going on since we added Kona, now 13, to our household. We have acquired the skill of stepping carefully about the house.

 Kona was the first one to perfect blocking doorways and being underfoot. Now, she has passed this "skill" along to our newbies, Misha and Nika, and even our cat, Bailey. We have tried to train this out of our brood but they are so darned pack-driven they just keep coming back to their favorite spots which happen to be in the way.
Vegan chocolate kiss, cookie dough cookies


Do you think I can blame all these dogs underfoot for my chocolate attacks/obsession? It works for me. I have been a lover of cookie dough since the beginning of time. Cookie dough balls, dipped in chocolate, fly out of my freezer. The last one I devoured recently was delicious but also an inspiration for another chocolate treat. As I savoured the last bite, I thought why not put the chocolate on the inside. That didn't work but instead Vegan chocolate kiss, cookie dough cookies were born. The name is a mouthful to say but who cares about the name, just eat 'em.

Vegan Chocalate Kiss, Cookie Dough Cookies

Ingredients:
1 cup ground raw or toasted sunflower seeds
1/3 cup quinoa flakes
2 scoops rice protein powder
1/4 cup cacao nibs
1 T. chia seeds
Pinch of salt
1 T. coconut nectar or agave nectar
Powdered stevia to taste
2 T. hemp milk or enough to make every stick together
Chocolate protein seed butter (make your own by combining 2 T. melted coconut oil with 1/2 cup unsweetened sunbutter or other seed/nut butter of choice, stevia, 2-3 scoops rice protein powder)

Directions:
For the cookie dough: mix everything but chocolate protein seed butter in a food processor. Scoop out tablespoonsful of the cookie dough and place onto a wax-paper lined cookie sheet. Pick up one hunk at a time and make a small indentation on top with your fingers. Fill the indentation with chocolate protein seed butter which serves as the "chocolate kiss." Place the cookie dough cookies in the freezer to firm everything up. Snack on as desired but be careful, these are dangerous!

More good stuff at: http://www.dietdessertndogs.com/2011/11/17/wellness-weekend-november-17-21/

Saturday, November 12, 2011

Vegan pumpkin seed bars with coconut glaze

Dogs in the kitchen as usual

Bailey and Misha investigating food ops in kitchen

Vegan pumpkin seed bars with coconut glaze
The dogs are still overtaking my life and my kitchen but they are adorable especially when sleeping. The rest of the time it is pure chaos. Bailey and Misha offer a glimpse of what it's like getting anything done in the kitchen in the photo above where they are investigating what's on the stove.

The new kid in the house, Nika, loves food like nothing I have ever seen. She is literally a shopvac when it comes to eating her food. She could easily enter a professional eating contest if they had such a thing for canines.

The best time to prepare anything for the humans in the house to eat is when all the dogs are sleeping which actally works part of the time. I had a nice one-hour window of tranquility to prepare the vegan pumpkin seeds bars.

Vegan Pumpkin Seeds Bars

Ingredients:
  1. 3 cups of quinoa flakes or rolled oats
  2. 1/4 cup coconut sugar
  3. 1/4 cup coconut syrup
  4. stevia for additional sweetness
  5. 3 scoops rice protein powder
  6. 2 cups of seeds (or nuts) of your choice ground in a coffee grinder.
  7. 1/4 cup unsweetened sunbutter or use other seed or nut butter of choice.
  8. 2 T. coconut oil, melted
  9. 1 T. cinnamon or pumpkin pie spice
  10. 1/4 cup unsweetened hemp milk (or other alternative dairy beverage)
  11. 1 + cups of pumpkin puree
Directions:
  1. Preheat the oven to 350 degrees.
  2. Spray a large cookie sheet.
  3. Process all the ingredients in a food processor.
  4. Add enough pumpkin puree and hemp milk to get the mixture to hold together.
  5. Spread the mixture onto the cookie sheet. It should be about 1/3-inch thick.
  6. Bake in the oven for 30 minutes or so.
  7. Cut into bars and spread them apart on the cookie sheet.
  8. Return the bars to the oven for 10 minutes.
  9. Remove them again and flip them over
  10. Continue baking until the bars are firm. Remove those that get done sooner as needed.
  11. When done, place the bars to cool on a rack.
  12. In the meantime, prepare a simple glaze of 1-2 T. coconut butter melted with 1 T. coconut oil.
  13. Drizzle on the cooled bars and allow to harden.
  14. Store the bars in the fridge or freezer.

There's more at: http://www.dietdessertndogs.com/2011/11/10/wellness-weekend-november-10-14-2011/

Sunday, November 6, 2011

Cauliflower-pumpkin (cheesecake) spread

Take a look at my kitchen floor. There's nary a cat in sight but the dogs are wall to wall as my menagerie grows yet again. This time the new addition is two-month-old Nika, a red malamute pup.  I think I should have called my blog, "Dogs in the Kitchen," because it looks like they have taken over. 

Here's some shots of the new dog in the kitchen.

Well, you can probably guess this new little "floor rug" has been keeping me busy, almost too busy to cook. The first few days I had no life other than getting Misha, Kona and Bailey, the cat, to embrace their new sister, Nika. There was lots of protesting in the form of howling and whimpering from Nika, and snarling and snapping from hyper, alpha boy, Misha. Kona was good with whatever as long as she got her food while Bailey hid under the bed.

Fortuntely, most of the kinks have been ironed out in the past three days; well, all but the potty training. That's a whole different issue. I continue to spend most of my time at the end of several leashes as I take the wee one (16 pounds), accompanied by her new pals, on endless walks to get the "deed" done outside.

I managed to pull together a nice veggie-protein spread, "Cauliflower-pumpkin (cheesecake) spread," that keeps my snacking, hunger-pains at bay and tastes delicious too, almost like pumpkin cheesecake, but much healthier! It's super easy too which makes it a lifesaver right now.

Cauliflower-pumpkin spread

Cauliflower-pumpkin spread with chocolate topping

Cauliflower-pumpkin (cheesecake) spread

Ingredients:
  1. 1/2 medium cauliflower, washed, trimmed and riced in food processor
  2. 2 T. unsweetened sunbutter, tahini or other nut or seed butter
  3. 1 cup pumpkin puree
  4. 1 tsp. agave nectar plus stevia
  5. 1 tsp. cinnamon or pumpkin pie spice
  6. 2-3 T. rice protein powder
Directions:
  1. Rice the cauliflower in a food processor
  2. Add the nut or seed butter, pumpkin, protein powder and sweetener
  3. Process until you have a smooth spread
  4. Add more pumpkin puree or bit of water if spread is too thick
  5. Serve on crackers, rice cakes
  6. Extra stores well in fridge for up to a week
Don't forget to take a gander at more recipes at: http://www.dietdessertndogs.com/2011/11/03/wellness-weekend-november-3-7-2011/

Friday, October 28, 2011

Celebrating Halloween candida-style

Halloween has always been one of my favorite holidays even though environmental and food allergies (and now candida) prevent me from enjoying some of the traditional festivities, such as hayrides, corn mazes and eating lots of goodies. The trick to having a good Halloween and other holidays, despite your issues, is to stick to foods you can eat and create new traditions.

Replace traditions that won’t work with new ones. The past few years I have been growing a huge pumpkin patch. When the pumpkins are ready, I invite friends with their kids over to pick a pumpkin or two for their Halloween jack-‘o-lanterns. The extra pumpkins are donated to the Salvation Army for families in need.


Some others Halloween activities I’ve tried are a scary movie night with “safe” snacks and goodies, going out to a favorite restaurant and movie, and hosting a gathering at my home (this can be with or without costumes). For a child with food allergies, plan a Halloween scavenger hunt instead of trick or treating.

Don’t wait until the last minute to make "safe" treats, or plan a Halloween menu if you or family members have food concerns. This year, I've already tried out a few "spooktacular" recipes.


Sunflower-seed encrusted apples
For a healthier take on candied apples, I made sunflower-seed encrusted apples. If nuts work for you, try almonds in place of the sunflower seeds.

Ingredients:
1/4 cup toasted sunflower seeds
1 tsp. apple pie spice
1/4 cup coconut sugar
2 gala apples, halved and cored
1 T. coconut oil
1 cup water

Directions:
Grind the sunflower seeds in a coffee grinder. Combine the ground seeds with spices and sugar in a small dish. Wet the apples lightly and press into the spice mixture.

Heat the coconut oil in a heavy skillet. Brown the cut sides of the apples in the oil for 1-2 minutes. Turn the apples over, and add the water and extra spice mixture. Bring to a boil and then simmer for 45 minutes, or until the apples are tender and sauce is thick.

Place an apple half in a small dessert dish and top with extra sauce and vegan yogurt.


Vegan pumpkin squares


I also tried Vegan pumpkin squares.

Ingredients:
1 cup amaranth or quinoa flour
1 cup pumpkin puree
1/2 cup coconut kefir milk
1 T. chia seeds with 4 T. of water
1 1/2 tsp. gluten-free baking power
1/2 tsp. baking soda
1/4 tsp. salt
2 T. coconut oil, melted
1/2 cup coconut sugar

Directions:
Preheat oven to 350 degrees. Spray an 8 X 8-inch baking pan. Mix all ingredients in food processor. Pour into the prepared pan and bake 20 minutes or until fork inserted comes out clean. Cool slightly and serve with dollop of vegan coconut yogurt.


Pretty spooky: a dog with a cone head

3 more days with hood

My pup, Misha, will be celebrating Halloween in an extra special way---cone-free after 15 long days. It's been a long period of confinement for not just Misha, but all of us. You can see from the pix above that Kona will appreciate the cone-less Misha more as well. We were thinking of dressing Misha up as a megaphone for Halloween but somehow I don't think he would appreciate it!


More great recipe ideas at: http://www.dietdessertndogs.com/2011/10/27/wellness-weekend-october-27-31-2011/

Saturday, October 22, 2011

Herbed flax-quinoa crackers


I'm just a little hooded husky!


I can't get this cone off no matter what position I'm in.

I feel so trapped!


My husband and my husky, Misha, have a common bond. They are both ADHD! Now, imagine putting one of them--the six-month-old husky--- in a cone for two weeks while he recovers from surgery. I've been called a saint for putting up with my husband but this is really testing my mettle.

Misha is usually bouncing off the walls but the cone has added a whole new dimension. He reminds so much of my husband after he has been concentrating on something for a few hours. He's like someone ready to come out of his skin.

He (the animal ADHD'er) can't chew any of his toys or play with his animal buddies, Kona and Bailey. He has no peripheral vision which means he can't be allowed to have any unstructured play. His lack of vision also makes him a total klutz when it comes to chasing a ball or even sniffing for a bathroom spot. I wish I had a time machine to transport him 10 more days into the future when he gets his sutures out.

I've noticed a stronger bond between my human and animal ADHD'ers since Misha had his surgery. I think my husband can empathize much better than I can because he feels trapped like Misha does in the cone. But his human entrapments are the constraints of job, time schedule and other demands. He really comes to Misha's defense when I'm about ready to phone for doggie day care (not really).

There are certain advantages of having to provide only structured activities for a hooded husky. The biggest one is all the walks I've been taking the pooch on. I call this an advantage because all of the delicious recipes I've been trying recently have packed on the pounds.

I guess that's one of the problems of being a recipe blogger. You are constantly experimenting with and trying new recipes, many of which are desserts because after all, what do we all love. But, I need to get real. There are only so many desserts any human who wants to maintain or lose weight should be eating.

Another problem is no one else in my family wants to eat vegan, no-gluten desserts. You guessed it. I have to finish all of it which is not a good plan. This is why I have challenged myself to try only one new dessert or snack recipe each week. I guess what I am saying is we need more low-calorie vegan options out there. I would challenge all of you (who are fellow bloggers) to rethink what we are putting on our blogs. Are we contributing to obesity or does everyone out there have self-control?

This week I made some healthy crackers, instead of a dessert. They are lower calorie but not calorie-less. I'm guessing a serving would be about four crackers (120 calories). That's assuming you cut 48 crackers. Mine are extra thich because I am not good at rolling stuff out. I only got 24 crackers.

I also made a sweet, low-calorie chocolate spread to go with the crackers but my human ADHD'er snagged the camera before I could snap a picture. (He put the camera out in the car because he was going to need it the next day. It's one of his ADHD memory tricks. Put things in the car or in your backpack the night before.)
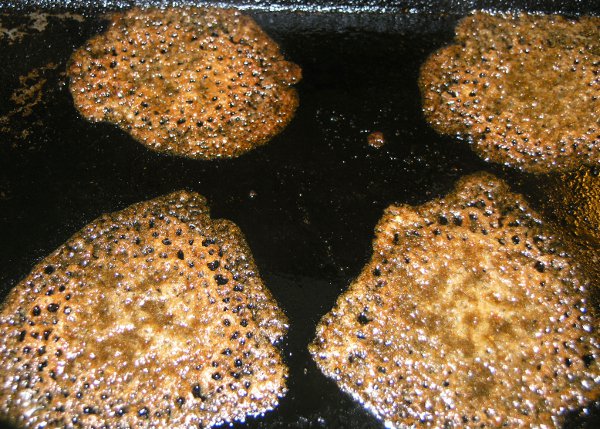
Flax-quinoa crackers

Herbed Flax-Quinoa Crackers
(makes 4 dozen if you are good at rolling out the dough)

Ingredients:
  • 1/2 cup ground golden flax
  • 1 1/2 cups quinoa flour
  • 2 tsp. gluten-free baking powder
  • 1/2 tsp. sea salt
  • 2 T. melted coconut oil
  • 1 T. dried cilantro or parsley (your choice)
  • Optional: other dried herbs
  • 1/2 cup unsweetened hemp milk
  • pan spray
  • ground black pepper
Directions:
  • Preheat oven to 350 degrees.
  • Put flax, flour, baking powder, salt and coconut oil in a food processor and mix until mixture resembles a coarse meal.
  • Stir in herbs. Pour in milk and mix until dough comes together.
  • Divide dough in half. Roll out each piece on a lightly floured surface to a nine-inch square. Transfer to sprayed baking sheets. Cut each square into about 24 crackers with a pizza cutter.
  • Spray with pan spray. Sprinkle with salt and pepper.
  • Bake until slightly firm about 20 minutes.
  • Flip crackers and continue baking until firm and brown. About 10 more minutes.
  • Check often to account for differences in oven temperatures.
  • Transfer to wire racks to cool.

I am submitting this recipe to Weekend Wellness at: http://www.dietdessertndogs.com/2011/10/20/wellness-weekend-october-20-24-2011/


Sunday, October 16, 2011

Kale apple salad

Kale apple salad
Kale has been recognized as an incredibly nutritious vegetable since ancient Greek and Roman times. It's rich in health-benefiting polyphenolic flavonoid compounds such as lutein, zeaxanthin, and beta-carotene.

Best yet, kale loves cool fall weather which makes the vegetable sweeter and more flavorful. I love kale which is a good thing since I have a plentiful crop in my garden. Three years ago, I planted some kale and ever since then my crop has spread to cover two-thirds of a 16-by-20-foot garden area. You probably guessed kale has some great self-propagating qualities.

Here's a simple-to-make recipe using kale and other fall crops.

Kale Apple Salad (4 servings)

Ingredients:
  1. One bunch kale, washed and chopped into 1/2-inch pieces
  2. 1 carrot, peeled and diced
  3. 1 gala or other sweet red apple, cored and diced
  4. Optional: 2 diced green onions
  5. Lime sunbutter dressing: in a food processor, combine 1/4 cup sunbutter, 2 T. sunflower seeds, 1/4 cup lime juice, stevia, 1 tsp. sesame oil, 1 T. Bragg's amino acids, water to thin if needed.
  6. Optional: toasted sunflower seeds for sprinkling on top
Directions:
  1. Combine kale, carrot, apple in a large salad bowl. Toss ingredients and drizzle 3 T or more of the lime sunbutter dressing. Reserve the rest for later.
  2. Give the salad another toss to mix the dressing.
  3. Sprinkle on the sunflower seeds if desired.


    Shared with http://www.dietdessertndogs.com/2011/10/13/wellness-weekend-october-13-17-2011/


Friday, October 7, 2011

Vegan brown rice pudding with pomegranate and chocolate

Jerusalem artichokes in bloom

Jerusalem artichokes at 12 feet in height
Vegan brown rice pudding with pomegranate and cacao nibs

I decided to try growing Jerusalem artichokes this summer for the first time. I didn't know quite what to expect and was totally overwhelmed when they bloomed just like sunflowers (pictured above). I have always loved sunflowers and decided to snap a few photos before the blooms faded away.

Now, I am waiting to harvest the artichokes which are actually tubers that grow underground like potatoes but are lower glycemic. I can't have any artichokes just yet as they cannot be harvested until after the first frost but I can still enjoy their beautiful blooms. In the meantime, I have no recipe with Jerusalem artichokes but I did get a inspiration for a dessert/breakfast from a pomegranate I found at the market.

Vegan Brown Rice Pudding with Pomegranate and Cacao Nibs

Ingredients:
  1. 2 cups regular coconut milk
  2. 4-5 T. coconut nectar or substitute less agave syrup
  3. 2 T. chia seeds
  4. 2 cups brown rice cooked
  5. pomegranate seeds
  6. cacao nibs
Directions:
  1. Place the coconut milk and nectar in a pan. Heat the mixture.
  2. Add the precooked rice to the milk mixture and bring to a low simmer for 3-4 minutes. Remove from the heat and stir in the chia seeds.
  3. Place in a container and cool in the fridge.
  4. To serve, spoon into dessert dishes and top with a sprinkling of pomegranate seeds and cacao nibs or shaved chocolate.
More great ideas here: http://www.dietdessertndogs.com/2011/10/06/wellness-weekend-october-6-10-2011/

Friday, September 30, 2011

Kale-topped sweet potato

Backpacking to Box Lake near McCall, Idaho

Misha recovering from backpacking trip
My recovery food: kale-topped sweet potato

Beets and sweets; another favorite
September has provided such unbelievable weather where I live. We had to take advantage of the warm days and cooler nights to plan and take another backpacking trip. We made an overnight trek to Box Lake near McCall, Idaho, about a three-hour drive from where we live.

 It was absolutely perfect (well, except for the 1,800-feet elevation gain in 2.7 miles). There were no bugs; the lake and sky were crystal clear; and the temperature was in the 70s.

We're all nursing some sore legs after climbing and then descending the steep trail on the return. Misha, our Malamute-Husky, accompanied us and had another great adventure. He dug in the wet sand along the lake beach; chewed on all the pine cones he could find; and dove in the water again and again.

Now, he is tired as you can see in the picture above. He managed to find enough energy to hop up on the bed, where he is not supposed to be. I didn't have the heart to chase him off.

As for me, I am craving my favorite sweet potato dishes. One is kale-topped sweet potato which is oh, so easy to prepare. Simple-to-prepare dishes are my cup of tea.

Kale-topped Sweet Potato

Ingredients:
  1. 1 baked sweet potato
  2. 2 cups chopped kale
  3. 1 diced zucchini
  4. salt and pepper to taste
  5. 1-2 tsp. olive oil
  6. optional: 2 garlic cloves minced
  7. lime-sunbutter dressing (2 T. sunbutter, 1/4 cup water, juice of one lime, 1 tsp. sesame seed oil, 1 T. sunflower seeds, dash of stevia)
Directions:
  1. Saute the kale and zucchini in olive oil with the optional minced garlic cloves added if desired. Season with salt and pepper.
  2. Whirl up lime-sunbutter dressing in your food processor.
  3. To assemble, top sweet potato with kale mixture and finish with a dollop of lime-sunbutter dressing.
Check out some more healthy recipes at: http://www.dietdessertndogs.com/2011/09/29/wellness-weekend-september-29-october-3-2011/

Thursday, September 22, 2011

Carrot cake bites

Okra in bloom

Carrot cake bites

I wish I had planted more okra this summer. Not only is it delicious but okra has the most gorgeous yellow blooms, as pictured above. My new favorite way to eat okra is to toss it with a little olive oil, salt and pepper, and roast it in the oven until tender. I just wish I had more!

My other most recent food passion is carrot cake. Well, my version of carrot cake isn't exactly a sheet cake with cream cheese frosting. Last week, I posted vegan carrot cake chia pudding. http://catsinthekitchen.blogspot.com/2011/09/vegan-carrot-cake-chia-pudding.html
This week, I wanted small bites of carrot cake-flavored morsels so I came up with Carrot Cake Bites.

Ingredients for approximately 12:
  1. 2-3 T. of raw tahini butter
  2. 1/4 cup unsweetened coconut flakes
  3. 1 medium carrot, peeled and grated
  4. stevia to taste
  5. 2 T. raw pumpkin seeds
  6. 1 T. raw sunflower seeds
  7. 1 T. chia seeds
  8. 1/4 tsp. ground cinnamon
  9. 2 T. Artisana coconut butter
Directions:
  1. Chop or grate one carrot in the food processor.
  2. Add the seeds and pulse to chop.
  3. Add the tahini, coconut flakes, stevia, cinnamon, and continue pulsing until mixture sticks together.
  4. Roll small balls of the mixture and drizzle with melted coconut butter.
  5. Chill in the fridge to harden coconut butter. These also store well in the freezer and do not become hard.
There are many other great recipes at http://www.dietdessertndogs.com/2011/09/22/wellness-weekend-september-22-26-2011

Saturday, September 17, 2011

Vegan carrot cake chia pudding

Misha mugs hubby while Bailey watches from background and Kona doesn't want to look.
Vegan carrot cake chia pudding
Don't let Misha's cute, smiling face fool you. He is a handful as you can see in the picture above. My hubby was trying to check Kona's feet for cheat grass only to be mugged from the rear by Misha. Bailey, the smallest pet in the family, was smart. He stayed back and watched from a distance.

My husband, true to form, wanted a photo of Misha being naughty. I think the two have a common bond as they both are ADHD.

Anyhow, all of this interrupted me as I was about to dig into a batch of Vegan Carrot Cake Chia Pudding.
This stuff is so good I would actually rather eat it than chocolate. That's pretty hard to believe for a chocolate addict as I am. It's also easy to make which pleases me.

Vegan Carrot Cake Chia Pudding
Ingredients:
  • 1 medium carrot, peeled
  • 3 T. chia seed
  • 1 scoop vegan rice protein powder
  • powdered stevia
  • 1 -2 T. pumpkin seeds
  • 1 T. sunflower seeds
  • 1/4 tsp. ground cinnamon
  • 2 T. unsweetened coconut flakes
  • 3/4 cup unsweetened coconut milk or other non-dairy "milk"
  • Optional: 1 tsp. agave or coconut nectar
  • Artisana coconut butter for drizzling on top
Directions:
  • Grate carrot in your food processor. Add everything else except the Artisana coconut butter. Pulse until everything is mixed. Pour into container for refrigerating overnight. Drizzle on coconut butter just before eating.
I submitted this recipe to Weekend Wellness at http://www.dietdessertndogs.com/2011/09/15/wellness-weekend-september-15-19-2011/

Sunday, September 11, 2011

Gluten-free, Vegan Chocolate-Zucchini Brownie in a Mug or Pan

Chocolate-Zucchini Pan of Pudding Brownies
Chocolate-Zucchini Brownie in a Mug
Bailey and Kona lounging

 Desserts are my downfall, especially chocolate ones. That's why I've decided to make single-serving desserts as much as possible. My theory is there will no longer be the call of the leftover desserts from the freezer or fridge.

I probably sabotaged my whole plan by making my first single-serving dessert creation a microwavable one that can be ready in five or less minutes. Oh well, I guess I will need some willpower after all.

I took a full-size recipe for vegan and gluten-free brownie pudding cake (pictured above) and modified it to add zucchini and make one serving. Below are both single-serve and pan recipes.

Chocolate-Zucchini Brownie in a Mug (Vegan and Gluten-Free)
Make one huge serving or two small ones.

Ingredients:
  1. one medium-sized microwavable mug (I used a small one and had an overflow problem.)
  2. pan spray
  3. 4 T. amaranth flour or other gluten-free flour
  4. 1/4 cup grated zucchini
  5. 2 T. raw cacao
  6. pinch of salt
  7. 1/2 tsp. chia seed mixed with 1 T. water
  8. 3 T. cultured coconut kefir milk or regular coconut milk
  9. 1 T. melted coconut oil
  10. 1 T. coconut sugar or other sweetener
  11. 1 T. cacao nibs
  12. 1/2 tsp. gluten free baking powder
  13. 1/4 cup water mixed with 2 tsp. cacao and 1 T. coconut sugar
Directions:
  1. Spray mug with pan spray.
  2. Measure flour, zucchini, salt, cacao, baking powder in mug.
  3. Place chia in water in a separate container and let stand for a few minutes before adding to mug ingredients.
  4. Add coconut kefir or milk, chia, coconut oil and cacao nibs and mix.
  5. Pour on top the water, cacao, coconut sugar mixture.
  6. Microwave 3 minutes and enjoy immediately or later depending on your willpower.
Full Size Chocolate-Zucchini Brownie Pudding Cake
(makes 6 servings)

Ingredients:
  1. 1 cup amaranth flour
  2. 1 cup grated zucchini
  3. 1/2 cup coconut milk or coconut kefir
  4. 4 T. cacao powder
  5. 1 T. chia seeds mixed with 4 T. water, allow to set 15 minutes
  6. 1 1/2 tsp. baking powder
  7. 1/2 tsp. baking soda
  8. 1/4 tsp. salt
  9. 2 T. melted coconut oil
  10. 1/2 cup coconut sugar
  11. 1 1/2 cups boiling water mixed with 1/3 cup cacao powder, dash of salt and 1/2 cup coconut sugar
Directions:

  1. Preheat oven to 350 degrees.
  2. Mix all  ingredients (#1-10 in ingredients list) in a large bowl with the exception of the 1 1/2 cups boiling water, 1/3 cup cacao, dash of salt and coconut sugar.
  3. Spray an 8 by 8-inch baking pan.
  4. Pour ingredients #1-10 into baking pan.
  5. Pour boiling water mixture over the top.
  6. Bake 40 minutes at 350 degees.
  7. Serve warm with vegan ice cream.

Thursday, September 8, 2011

Okra saute and my journey into raw and veganism

Okra saute plated with veggie burger and savoy cabbage slaw

Savoy and red cabbage slaw

Sometimes I call myself a vegan just to make it easier for others to understand that I cannot eat dairy, eggs and many kinds of meat. It's less complicated than explaining, "You see I have these delayed food allergies to all these things, blah, blah, blah," which usually results in them giving me blank stares.

So, since I've been using the vegan label, I decided I would actually go completely vegan (and dabble into raw cooking sometimes) for two weeks. I also secretly hoped going vegan might help me lose some weight. That was a pipe dream. You see, you actually have to reduce your caloric intake to lose weight.

It's also a perfect time to become vegan as my garden is overflowing with produce. This year, I grew okra, a vegetable I remember fondly from childhood. My father was a good ole Alabama boy who loved his okra. But somehow, eating okra as an adult escaped me. It probably didn't help that everytime I mentioned it to my husband, he would  respond, "Oh, you mean that slimy stuff."

Strangely, I didn't remember it as a slimy vegetable.When I saw okra in this year's seed catalog, I knew I had to give it a try. Okra, fresh from the garden, is amazing! Just make sure you pick it when the pods are four or less inches long. I didn't realize this on my first harvest and let them get really big before picking. It was like eating wood. Pick them small and they are wonderfully tender.

I must admit after many years of not eating okra, I wasn't sure how to prepare it. I searched the internet and found a vegan recipe for okra saute which I adapted to fit my needs.

Okra Veggie Saute on Veggie Burgers with Savoy Cabbage Slaw
(serves one or two)

Ingredients:
  1. 5-6 small okra sliced into rounds
  2. pan spray and olive oil
  3. salt and pepper
  4. optional: cumin
  5. half a medium onion sliced into half moons
  6. small or medium zucchini, diced
  7. veggie burger(s)
  8. cole slaw (recipe for my version below)
Directions for Saute:
  1. Heat oil in a medium skillet.
  2. Add onion and cook 2 minutes.
  3. Add okra and zucchini and continue cooking until all  veggies are tender. Salt and pepper and add any other spices, herbs.
  4. While the veggies are cooking, slide them over and add your veggie burgers to cook.
  5. Serve on a bed of slaw with a drizzle of your favorite vegan dressing or more of the slaw dressing described below.
Savoy Cabbage Slaw

Ingredients:
  1. 1/4 head savoy cabbage chopped
  2. 1/4 head red cabbage chopped
  3. 1 carrot peeled and chopped or shredded
  4. For dressing: 1/4 cup tahini, juice of one lime, 3-4 T. water, 1 tsp. sesame oil, salt and pepper, stevia to taste, 2 diced green onions, 2 T. raw sunflower seeds (Makes more than you will need for slaw.)
Directions:

  1. Mix dressing ingredients in a food processor. Add more water to make it pourable.
  2. Put veggies in a large bowl and drizzle on desired amount of dressing.
  3. Toss and mix.
I've shared this recipe on http://www.dietdessertndogs.com/2011/09/08/wellness-weekend-september-8-12-2011/.

Thursday, September 1, 2011

Post-backpacking reward

Misha and I in the a.m. at Loon Lake
My post-backpacking reward
Lace cookie cones
Baked
lace cookie cones before shaping. Notice their airy appearance.
No- cook backpacking cereal with blueberries
Food and environmental allergies, as well as candida, needn’t stop you from getting out and trying new adventures as I found out when I went backpacking. The keys to making it work and having fun are planning and preparation.


I recently completed two overnight adventures with all my gear on my back. That gear included my allergy meds (singulair, nasal wash syringe and solution packets, nasal spray) and all my allergen-free meals and snacks that also were low glycemic.

I had no idea what I was getting into when I started preparing my own backpacking foods for a two trips, one for two days and the other for three days. But it was well worth the effort. Our last backpacking trip was into Loon Lake, a 12-mile round trip journey along the Secesh River. The scene I enjoyed in the morning after our hike in the previous day is pictured above. Misha, my husky-malamute, went along.

I enjoyed some great food including No-cook breakfast cereal which was a tweaked version of Breakfast Porridge, a recipe I found on http://www.dietdessertndogs.com/


Ingredients
2 T. unsweetened coconut flakes
2 T. raw pumpkin or sunflower seeds
1 T. chia or flax seeds
2-4 T. quinoa flakes
1 T. vegan rice protein
½-3/4 boiling water
Sweetener of choice
½ cup freeze-dried blueberries
2 T. powdered soy milk

Pre-trip preparation: grind seeds and coconut in a coffee grinder. Transfer to a container and mix in other dry ingredients. Pour into a zippered plastic bag. Place blueberries in a separate pouch. Rehydrate everything with 1/2-3/4 cup boiling water when ready to eat and enjoy. I rehydrated and ate my breakfast in the same heavy-duty freezer bag I used to pack it in. It saves a lot of clean up!

The weather on our outing was a bit hot for the mountains, high 80s, so I was kind of drooling for something cold and refreshing after hiking out. The next day after getting home, I got busy in the kitchen whipping up some blackberry-banana sorbet. That wasn't enough. I also wanted some kind of cone to put it in, just like an ice cream cone. The result was Lace Cookie Cones with Blackberry Sorbet. The cones were super easy to make.

Ingredients
2 T. coconut sugar
1 T. agave nectar or yacon syrup
1/4 cup quinoa flour
3 T. canola oil

Directions
Preheat the oven to 350 degrees. Pan spray a cookie sheet. Mix all ingredients in a medium bowl. You should get a fairly runny batter. If not runny, add more oil or agave. Drop by tablespoons-full onto the cookie sheet. Bake in the oven for 4-5 minutes. The batter should spread out as pictured above. If it doesn't, you will end up with cookies rather than lace cookies.

Remove from the oven. Allow to cool for 3-5 minutes before attempting to move with a spatula. Shape the cookies into cones by wrapping around a wooden spoon handle. Or shape into a small edible dish by placing into a small dessert bowl. Place in the freezer to harden before filling with your favorite frozen dessert.

I made blackberry sorbet with one-cup of fresh blackberries I picked from the garden. Other ingredients included: frozen banana chunks from 1/2 a medium banana, 1 tsp. agave nectar, 2 T.+ coconut milk and dash of stevia.

It came together pretty fast, which was a good thing, as I had been drooling for a frozen dessert since hiking out the day before.


I've entered this recipe in Wellness Weekend at http://www.dietdessertndogs.com/2011/09/01/wellness-weekend-sept-1-5-2011-plus-an-event-update


Thursday, August 25, 2011

Backpacking cacao-spinach-chia pudding

Bad boy Misha investigates dinner and backpacking foods on counter.
Freezer bag backpacking meals
Backpacking or easy-travel cacao chia pudding
My husky puppy, Misha's latest trick is to stand on his hind legs to try to reach whatever food items are on the kitchen counter. What this means is never leave the kitchen unsupervised when food is out. The picture above was taken after I didn't follow this rule and left the kitchen to return to find "you know who" trying to reach our dinner. Of course, my husband had to encourage him to do it again so he could snap a picture.

At least, the masked-bandit Misha wasn't successful in making off with any of our food. It's hard to stay mad at him but I admit I could have if he had taken any of the backpacking foods I had labored over preparing for hours.

I had no idea what I was getting into when I started preparing my own backpacking foods for a two trips, one for two days and the other for three days. It took forever and didn't help that husband simply grabbed some Mountain House entrees off the shelf at REI.

I spread the task over several days and ended up spending about four hours. All those freezer bags in the photos above contain all my meals, treats, snacks for the trips. Everything had to be pre-assembled in freezer bags and ready to simply add hot or cold water on the trail to rehydrate. Fortunately, I got some great ideas from a website called http://www.trailcooking.com/

I tested out some of my backpacking meals at home and found out how easy it is to rehydrate foods in freezer bags. The idea of pre-packaging foods in freezer bags can be used for taking lunch items to work or packing along foods for travel, biking trips, hiking. I'm sure there are more possibilities!

One of my favorite backpacking recipes is Backpacking Cacao-Spinach-Chia Pudding. If you are not a backpacker or hiker, it could easily be taken along anywhere or just kept on hand for easy preparation when you are in a hurry.

Ingredients for 1 serving:
  1. 2 T. freeze-dried spinach (can be purchased from http://www.beprepared.com/)
  2. 1 1/2 T. chia seeds
  3. 1 1/2 T. cacao powder
  4. Stevia to taste
  5. 2 T. seeds of your choice (I used half each pumpkin and sunflower seeds)
  6. 1 T. hemp seeds
  7. 1 T. rice protein powder
  8. 1-2 tsp. cacao nibs
  9. Optional: 1 T. unsweetened coconut flakes, 1 T. powdered soymilk (purchased from http://www.iherb.com/)
Directions:
  1. Place chia seeds, pumpkin, sunflower and hemp seeds in a coffee grinder and grind until a coarse meal.
  2. Place all ingredients in a pre-labeled pint or quart-sized freezer bag.
  3. To rehydrate, simply add 1/2 cup cold or warm water. Can be eaten immediately but best if you wait several hours.
Get more healthy, vegan recipe ideas at http://www.dietdessertndogs.com/2011/08/25/wellness-weekend-august-25-29-2011/