Showing posts with label sauces/topping. Show all posts

Sunday, October 13, 2013

Kale with lemon beet cream

Misha says hi to Chancy, the mare
I'm beginning to feel like the character Smeagol in Lord of the Rings. He calls the ring, "my precious." I call sunbutter, "my precious." I've grown so attached to it that it's been hard giving it up for the Paleo Autoimmune Protocol diet (AIP).

"How am I going to survive without sunbutter?" That was one of the first questions I asked when I started this elimination diet four days ago in hopes of getting remission or at least, reduced symptoms from fibromyalgia and gut issues.

I know you're thinking there must be lots of other things to eat. Yes, there are but it was one of my few guilty pleasure foods left. But in its place, I am subbing one of these: full-fat coconut milk, coconut oil or coconut butter.

The recipe for sauteed kale with lemon beet cream previously would have included sunbutter but it came out just as delicious with full-fat coconut milk.


Sauteed kale with lemon beet cream
 Here's what you need:

1 steamed or roasted beet
juice of 1 lemon
1/4 cup full-fat coconut milk (sub seed or nut butter, if desired)
1/4 sliced onion
1/2 bunch of kale
olive oil
salt and pepper
Here's what you do:


Peel and slice one red beet. Steam until tender or roast in the oven, if desired. Set aside to cool. Once cooled, place the beet, coconut milk, juice of lemon, salt and pepper in your food processor. Process until mixture is smooth and creamy.

Next, saute your greens with onion. Heat a large skillet with a drizzle of olive oil. Saute the onions until tender. Continue by adding the greens.

That's it! Super easy. Plate up your greens and top with a dollop of lemon beet cream. Serve as a side to some type of protein.


Saturday, October 12, 2013

Carrot-top broccoli

Misha gets in some "down-dog" zzzz's.
I am off and running on the Paleo Autoimmune Protocol (AIP)---Day 3 or the 30-day elimination diet. This more-restricted version of the paleo diet has worked well for many with autoimmune diseases who often have leaky gut issues and have plateaued on the full paleo diet.

On the protocol, I will be eating paleo (eerie similarity to anti-candida diet) but with some additional restrictions: no nightshade veggies, no dairy, no eggs and no seeds or nuts. Going on this diet was especially difficult because of the need to eliminate seeds and nuts. They make cooking meals, adding protein and healthy fats easy.

Why do I need to eliminate them? People with autoimmune diseases often have sensitivity to nuts and find eating them aggravates their symptoms. This would be true for me so I don't eat nuts.

 But what about seeds? Sunflower and pumpkin seeds are one of the least reactive foods. The problem is  people with autoimmune disease may have impaired gut function which makes the seeds difficult to digest. Foods that sit around in your gut contribute to leaky gut problems and create the perfect environment for the growth of harmful bacteria.
Carrot-top broccoli steaks
So, how do you cook without seeds or nuts, which often add creaminess to soups, sauces, etc.? I am subbing full-fat coconut milk. I purchase organic Natural Value Coconut milk which comes in BPA-free cans and has no starches added for thickening.
Here's what you need for my carrot-top broccoli:

1 broccoli head, sliced into 3 broccoli steaks
EVOO
salt and pepper
2 medium carrots, peeled
1/4 cup full-fat coconut(for regular Paleo, feel free to sub 1-2 T. of nut or seed butter)
steamed beets and cilantro for garnish


Here's what you do:

Preheat oven to 425 degrees. Slice the broccoli head lengthwise into three slabs. Place on a parchment-lined baking sheets. Drizzle with olive oil and sprinkle with salt and pepper. Cover with an aluminum foil tent and place in the oven for 20-30 minutes, until tender and slightly crisply.

While the broccoli cooks, peel and dice your carrots, and steam them until soft. Set aside to cool off.
When the carrots are cooled, puree them with the coconut milk in a food processor.

To assemble, place broccoli steaks on a bed of greens and spoon on some of the carrot cream. Serve this dish with some form of protein on the side.

Recipe contributed to:  http://www.rickiheller.com/2013/10/wellness-weekend-october-10-14-2013/#more-20848

Saturday, August 17, 2013

Luscious lemon avocado fruit pizza

Even a suitcase looks like a great place to explore for Bailey.
I love my pets but now there is even more reason to love them! Children who grow up with pets in the home have a lower risk of getting allergies, according to a study. Early pet exposure may reduce allergies even for children whose parents have allergies.

The explanation may be as simple as pets help strengthen the immune system by exposing children to more and different bacteria. A not-so-clean environment may force the immune system into developing a less allergic response pattern. The theory is let the kids play in the dirt.
The study’s finding also gave encouragement for having more than one pet. A child’s risk of developing allergies was reduced more if there were two or more pets in the home. Eight percent of kids with two or more pets were allergic to cats compared to 12 percent with one pet and 15.5 percent with no pets.
Cats are curious, loveable and help prevent allergies.
 
Bailey, the cat, and his other cat friends beat out dogs in another study. Researchers found that the preventative affect of cat ownership was stronger than dog ownership. High amounts of cat allergen had preventative effects against allergies.
Luscious lemon avocado fruit flatbread


 Doesn't that information just make you love your pets even more? Something else I know you will love is Luscious Lemon Avocado Fruit Pizza, ACD friendly.

Here's what you need for 1 serving:

For the topping:

1 avocado
1 T. coconut oil
vanilla stevia or other sweetener, to taste
Juice of one freshly squeezed lemon
1 T. lemon zest
Berries, such as strawberries, blueberries
Coconut flakes

For the pizza, flatbread:

 1/3 head of cauliflower, riced
2-3 chia eggs (mix 2-3 T. of chia with 3-4 T. of warm water and allow to gel) or 1 organic egg
1/4 cup raw or toasted sunflower seeds ground into flour using a coffee grinder
1/4 tsp. salt


Here's what you do:

For the topping:

Place avocado, lemon juice and zest, coconut oil (softened) and sweetener of choice in your food processor and blend until smooth. Place in fridge to chill.

For the pizza crust:

Preheat oven to 400 degrees. Put the raw cauliflower florets into a food processor and pulse until it resembles rice. Add the chia eggs or regular egg, salt and sunflower seed flour and pulse until blended.

Put the dough onto a pan-sprayed baking sheet. Cover the dough with a large piece of wax paper and smoosh it with your hands until it's about 9-12 inches in diameter (or make two rounds instead). Place the dough in the oven and bake for 30+ minutes (or 15 minutes with regular egg) or until dry but pliable.


To serve, spread chilled avocado mixture on flatbread. Top with berries and coconut flakes.

Recipe contributed to: http://www.rickiheller.com/2013/08/wellness-weekend-august-15-19-2013/#more-19617


Sunday, August 11, 2013

Zucchini and avocado fries with chipotle dipping sauce

A new Olympic event: synchronized sleeping
Are you beginning to feel like Tarzan going into the jungle when you head into your garden to pick zucchini? I've been harvesting an abundant zucchini crop but not without some issues. I am one of those people who gets allergic contact dermatitis from coming in contact with the prickly hairs on the vines of the zucchini plants.

To prevent the rash, always wear clothing that protects your arms, hands and legs.  Treat a rash by washing the skin with cold water and a mild soap. The rash, while annoying, should go away in about an hour. If not, apply an over-the-counter corticosteroid cream to reduce inflammation and relieve the itching.

Trimming back your bushy zucchini plants may allow you to pick the squash with less contact with the leaves. Trim leaves carefully to avoid removing too many flowers or robbing growing flowers of the shade they need. Start with dead leaves first. Then, cut off additional large and outer leaves but make sure you remove the entire stalk. Another option would be to use stakes and twine to contain the zucchini plants. They will grow up rather than out.


Zucchini and avocado fries with chipotle dipping sauce
Once you negotiate your zucchini jungle, you should come back with lots of zucchini. Oven-baked fries are one of my favorite things to make with medium to large zucchini. Don't use bazooka-sized zucchini. Make these with avocado fries and you have a meal.

Here's what you need for 1 serving of zucchini and avocado fries:

2 medium or 1 large zucchini (consider using a mixture of yellow and green zucchini)
olive oil
1 small avocado
2 T. ground sunflower seed flour (or almond flour, if tolerated)
1 flax or chia egg mixed in 2 T. coconut milk or 1 egg for a vegetarian option
salt and pepper

Here's what you need for the chipotle dipping sauce:

2 T. vegan or other yogurt
2 T. sunbutter (or substitute almond butter)
1/4 cup diced onion
1/4 cup diced red pepper
1/8 tsp. chipotle chili powder


Here's what you do:

Preheat oven to 425 degrees. Line 1 large and 1 small baking sheet with parchment paper. Cut the zucchini into fry-sized pieces. Place the zucchini fries on the large baking sheet. Drizzle with olive oil and sprinkle with salt and pepper. Toss with your hands. Place the fries in the oven. Bake for up to one hour or until crispy and golden.

In the meantime, prepare the avocado fries. Cut the avocado into fry-sized wedges. In a small bowl, stir up your chia eggs or regular egg, mixed with salt and pepper. Place sunflower seed or almond flour in another small bowl. Dip avocado fries into egg mixture and then roll in seed flour. Place the fries on the other parchment-lined baking sheet. Bake at 425 degrees or  25 minutes or until brown. Flip the fries once during baking time.

Prepare your chipotle dipping sauce. Place all the ingredients in a food processor, blender or magic bullet and blend until smooth.

Recipe contributed to: http://dietdessertndogs.com/2013/08/08/wellness-weekend-august-8-12-2013/

Place a few of those zucchini fries in the bowl, please.


Looking for some other zucchini recipes:

Sunbuttery Zucchini Noodles ACD-Phase 1, vegan
http://catsinthekitchen.blogspot.com/2011/08/sunbuttery-zucchini-noodles.html

Thai stir-fry pizza on cauliflower crust ACD-Phase 1, vegan
http://catsinthekitchen.blogspot.com/2013/01/thai-stir-fry-pizza-on-cauliflower-crust.html

Zucchini and garden veggie lasagna ACD-Phase 1, vegan
http://catsinthekitchen.blogspot.com/2013/08/zucchini-and-garden-veggie-lasagna-acd.html

Zucchini Fries ACD-Phase 1, vegan
http://catsinthekitchen.blogspot.com/2011/05/zucchini-fries.html

Zucchini Nacho Hashbrowns ACD-Phase 1, vegan
http://catsinthekitchen.blogspot.com/2013/07/zucchini-nacho-hashbrowns.html

Zucchini pile-ups with cilantro pesto, ACD-Phase 1, vegan
http://catsinthekitchen.blogspot.com/2013/07/zucchini-pile-ups-with-cilantro-pesto.html


Saturday, July 27, 2013

Zucchini pile-ups with cilantro pesto

Zucchini pile-ups with cilantro pesto
Do you have a deluge of zucchinis coming from your garden? You can use up a lot of zucchinis by making Zucchini pile-ups with cilantro pesto and grilled Belgian endive. It's healthy, delicious and ACD-friendly!


 Here's what you need for one serving:

1 yellow zucchini, sliced lengthwise
1 green zucchini, sliced lengthwise
1/4 red onion, sliced into thick pieces
1 Belgian endive, sliced lengthwise in half
Handful of mixed salad greens
1/2 avocado
1/4 cup pumpkin seeds
Juice of 1 lime or lemon
1 bunch of cilantro, washed and chopped
1 tsp. olive oil
salt and pepper
Splash of water
Optional toppings: sprinkle of pumpkin seeds, chopped cilantro

 Here's what you do:

First, prepare the cilantro pesto. Toss into a food processor or Magic Bullet-type device, 1/4 cup pumpkin seeds, bunch of cilantro, juice of 1 lime or lemon, 1 tsp. olive oil, salt and pepper, and splash of water. Pulse until thick and creamy. Transfer to a small container and chill in the fridge.

Grill your veggies on the grill or in a stovetop grill pan. Mash the avocado with a fork. Assemble your pile-ups. Start with a base of greens, alternate layers of zucchini strips and cilantro pesto, finish with grilled onion, avocado, and optional pumpkin seeds and chopped cilantro.
Now dig in!

Ready for more zucchini recipes? Zucchini hashbrown nachos is coming up soon.

"I thought this was a good snoozing spot. Boy, was I wrong!"
Recipe submitted to: http://dietdessertndogs.com/2013/07/25/wellness-weekend-july-25-29-2013/#more-18497

Saturday, February 2, 2013

Coco-spice sauce

Sauted kale and veggies with coco-spice sauce
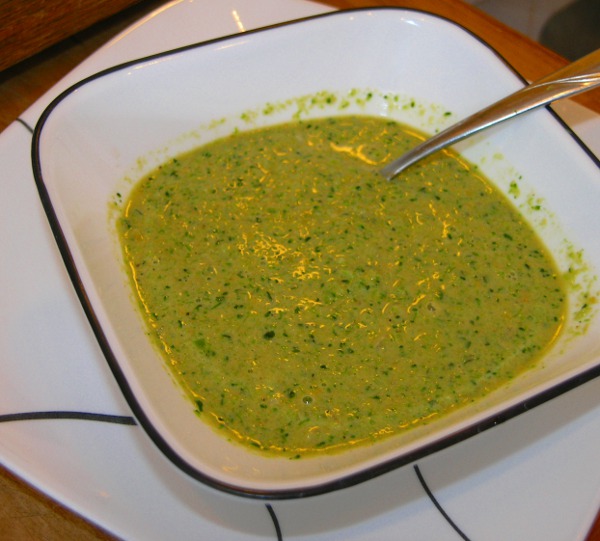
I just discovered the most delicious sauce. It's so good I think I could eat sawdust if it was covered with coco-spice sauce, suitable for ACD-Phase 1.

My coco-spice sauce was inspired by a recipe in The Plan by Lyn Genet-Recitas. You're going to love this stuff--either my version or her's.

Here's what you need:

  1. 1 large red onion, chopped
  2. Ground ginger, cinnamon, cumin, turmeric, black pepper (all to taste)
  3. 1 cup coconut milk (unsweetened and low-fat) Note: Her version uses 1 can of full-fat coconut milk
  4. 3-4 T. unsweetened sunbutter
  5. Sea salt to taste
Here's what you do:

  1. Saute the onion.
  2. Transfer the onion to a food processor or Magic Bullet-like device.
  3. Add the coconut milk, sunbutter and spices to your liking.
  4. Pulse until blended and thick.
Now for the best part: drizzle this sauce on veggies of your choice or blend it into a soup, like Coco-Spice Broccoli Soup, below.

Coco-spice broccoli soup

Here's what you need:

  1. 1 crown of fresh broccoli
  2. 1 zucchini, sliced
  3. 1/2 red onion, chopped
  4. 1 batch of coco-spice sauce
  5. handful of chopped cilantro
  6. Salt and pepper to taste
Here's what you do:

  1. Steam all the veggies until tender. Allow to cool, unless your food processor can handle hot foods.
  2. Add the veggies and other ingredients to your food processor and blend until smooth or slightly chunky if you prefer.
  3. Adjust seasonings to your preference.
  4. Serve hot with a sprinkle of pumpkin seed and chopped cilantro on top.
Beet flax crackers and spaghetti squash crackers

Don't forget the crackers to go along with your soup or salad.

Here's what you need for Beet Flax Crackers:

  1. 1/2 cup whole flax, soaked overnight
  2. 1/2 cup ground sunflower seeds
  3. 1 small beet, peeled and chopped
  4. 1 green onion, chopped
  5. 1/4 cup fresh cilantro, chopped
  6. 1 T. cumin
  7. salt and pepper to taste
Here's what you do:
  1. Preheat your oven to 350 degrees. Spray a large baking sheet with pan spray.
  2. Add the veggies to your food processor and pulse to grind.
  3. Toss in the other ingredients and pulse to blend.
  4. Spread the mixture with your hands on the baking sheet. Make it about 1/4-inch thick.
  5. Score the dough with a knife or pizza cutter to make rectangles.
  6. Bake for 20-30 minutes until the crackers are crispy.
Get the recipe for the Spaghetti Squash Crackers here:
http://catsinthekitchen.blogspot.com/2013/02/game-day-grain-free-crackers-with.html


"If I win this tug-of-war, can I have some coco-spice broccoli soup? Yummy!"


Saturday, December 29, 2012

Kale chips alfredo

Misha and Nika explore in the minimalist snow
Watching a wildlife television program on polar huskies made me realize why my snow pups, Misha and Nika, need constant exercise. The polar huskies were being trained for an Arctic expedition in which they would need to run eight hours a day and consume 6,000 calories with a 60 percent fat content.

My pooches are wearing me out giving them two hours of exercise a day. Of course, they are still ready to go again while I'm ready for a break. At least, it keeps the holiday calories at bay.

Kale chips alfredo
Even with all that exercise, I still have to watch how much I eat. Yes, it is possible to overconsume, even during Phase 1 of the anti-candida diet. That's why I'll be nibbling on kale chips alfredo for my New Year's Eve snacking. They are suitable for ACD-Phase 1.

Here's what you need:

For the Hemp Alfredo Sauce: (makes extra to use as sauce for veggies)
1 cup hemp seeds
1/2 cup hemp milk (unsweetened)
2 T. lemon juice
dash of stevia
1-2 tsp. miso paste
salt/pepper to taste
dash of nutmeg

For the Kale Chips
Leaves from one bunch of kale
3-4 T. hemp alfredo sauce


Here's what to do:

Make a batch of the hemp alfredo sauce by blending the ingredients until smooth and creamy in a food processor. Next, remove the leaves from the kale stems. Place the leaves in a bowl and drizzle with alfredo sauce. Toss with your hands. Spread the kale on a large baking sheet. Place on the top shelf of your oven. Bake at 350 degrees but keep your eye on them. Remove when crispy, about 15-20 minutes.


It's not easy, but still possible, to tire a sled dog out.

Here are some other kale chip ideas to keep you snacking healthily during 2013.

For the chocolate lover (suitable for Phase 3; substitute carob for Phase 1-2)
http://catsinthekitchen.blogspot.com/2012/01/chocolate-lovers-kale.html

For the everything veggie lover (suitable for Phase 1)
http://catsinthekitchen.blogspot.com/2011/12/kale-chips-with-works.html

For the chocolate and raspberry lover (suitable for ACD-maintenance)
http://catsinthekitchen.blogspot.com/2012/01/chocolate-raspberry-kale.html

Enjoy other recipes from:
http://www.dietdessertndogs.com/2012/12/27/wellness-weekend-december-27-31/

Happy New Year!

Sunday, December 2, 2012

Cauliflower crust pizza with hemp alfredo sauce

Gimme, gimme more!
I feel like licking my dish too, just like Nika, when eating my Cauliflower Crust Pizza with Hemp Alfredo Sauce. Yes, it is possible to have a delicious meal, full of flavor, when following the strict anti-candida diet (phase 1).

Cauliflower crust pizza with hemp alfredo sauce
I have been visited again by some unwelcome guests, called candida. Actually, the little beasties never leave you but it's your job to keep them under control by eating a low-glycemic diet and taking probiotics to put healthy bacteria back in your gut.

I strayed too far (for me) from the low-glycemic rule. It had been two years since my last bout with candida. No wonder, I thought I was cleared for eating more carbohydrates. In fact, after two years, I had to review the ACD-phase 1 rules for eating as I started this new round with candida.

The strictest version of the diet (Phase 1) would eliminate:

• Anything containing sugar;

• Simple carbohydrates, such as flour, cakes, cookies, breads, etc.;

• Foods that contain mold or fungus, such as yeast, mushrooms, peanuts, cashews, cheese;

• The most common food allergens, such as dairy, eggs, wheat, shellfish, peanuts, tree nuts;

• Foods that are fermented (alcohol, all condiments including ketchup, mustard, soy sauce);

• Anything artificial, processed, containing chemicals or additives, imitation or artificial seasonings flavorings and colorings;

• Soda pop, fruit juice, pre-sweetened drinks, coffee, tea (except herbal teas).

What's left to eat, you are probably wondering?

• All vegetables except starchy ones (winter squash, and heaven forbid, no corn. It's not really a vegetable anyhow);

• Some nuts and most seeds;

• Water;

• Natural, cold-pressed oils, such as olive oil;

• Lemon and lime juice;

• Stevia (a natural herbal sweetener that does not affect blood sugar levels as long as it's alcohol-free);

• Unsweetened alternative dairy beverages, such as soy milk

There are some exceptions to these rules depending on what program you are following. Some allow a bit of chocolate or carob; one serving of low-glycemic fruit: small amounts of sweet potatoes, carrots, beets; organic apple cider vinegar; legumes and whole grains (amaranth, quinoa, buckwheat, flaxseed) in restricted portions.


I discovered the return of the candida beasties at the same time my chronic pain was flaring. Candida is a common thread among people with fibromyalgia, as I discovered I had had all through my many bouts with yeast overgrowth. In my initial week taking antifungal meds, I have found my pain actually increasing. It's a common occurrence to have your symptoms increase as the candida beasties die off.

I also am working on improving the quality of my sleep which is a critical component of healing from fibromyalgia or anything for that matter. Without deep sleep, your body cannot repair itself. I am taking magnesium and a herbal sleeping potion to help me stay asleep rather than waking because of pain. So far, I am noting an improvement in my sleep.


It's time to get on to the good stuff: Cauliflower Crust Pizza with Hemp Alfredo Sauce.

You will need to serve 1:

Crust:
1/3 head of cauliflower, riced
2-3 chia eggs (mix 2-3 T. of chia with 3-4 T. of warm water and allow to gel)
1/4 cup raw or toasted sunflower seeds ground into flour using a coffee grinder
1/4 tsp. salt

Hemp Alfredo Sauce: (makes extra to use to make kale chips)
1 cup hemp seeds
1/2 cup hemp milk (unsweetened)
2 T. lemon juice
dash of stevia
salt/pepper to taste
dash of nutmeg

Toppings:
6 steamed asparugus stalks, cut into 1-2 inch pieces
6 artichoke hearts, halved
alfredo sauce kale chips

Hemp Alfredo Sauce Kale Chips
Leaves from one bunch of kale
3-4 T. hemp alfredo sauce

Preheat oven to 400 degrees. Put the raw cauliflower florets into a food processor and pulse until it resembles rice. Add the chia eggs, salt and sunflower seed flour and pulse until blended.
Put the dough onto a pan-sprayed baking sheet. Cover the dough with a large piece of wax paper and smoosh it with your hands until it's about 9-12 inches in diameter. Place the dough in the oven and bake for 30-40 minutes or until dry but pliable.

You'll need to make the hemp alfredo sauce before you can make the kale chips. It's almost too easy. Simply put everything in your food processor and blend until smooth and creamy. Set aside.

Next, make the hemp alfredo sauce kale chips. Remove the leaves from the stems. Place in a bowl and drizzle with alfredo sauce. Toss with your hands. Spread the kale on a large baking sheet. Place on the top shelf of your oven. Normally, kale chips are baked at 350 degrees but if you keep your eye on them, you can bake them along with the cauliflower crust. Remove when crispy, about 15-20 minutes.

Prepare your toppings. Once everything is ready, spread alfredo sauce on the prepared crust. Add your veggies and kale chips. Place in the oven for 5-10 minutes to heat through. Remove your pizza from the oven and get ready to enjoy a taste sensation, almost too good to be ACD-phase 1.


 I am wanting more, more, more of this pizza!

"I'll have some more food, please."

Contributed to: http://www.dietdessertndogs.com/2012/11/29/wellness-weekend-november-26-december-3-2012/


Saturday, June 9, 2012

Middle Eastern-seasoned tofu in garbanzo bean flour wrap

Sometimes you need a "precious moment" like this one
"That's life, that's what people say.
You're riding high in April,
Shot down in May.
But I know I'm gonna change their tune,
When I'm right back on top in June.”
Life does seem like a roller coaster of highs and lows as the lyrics go in Frank Sinatra's 60's song, "That's Life." Personally, I prefer things being more even keel, especially when it comes to my health. But this week my tummy got “shot down” by deceptive labeling on a package.

I am one of those with sensitivity to maltodextrin, along with other artificial sweeteners, and read labels like a hawk to avoid ingesting them. The other day, I received a sample package for a protein supplement that on the surface, appeared to be free of everything I need to avoid.

I read “free of gluten, yeast, milk, eggs, soy, nuts, fish/shellfish and wheat” and “free of artificial colors, flavors, sweeteners and preservatives” on the label and got lured into trying this product on one hurried morning. Big mistake! The manufacturers had added maltodextrin as a sweetener  (even though the label said free of artificial sweeteners) to make their product taste better.

Several hours after breakfast, I experienced the dreaded gastrointestinal side effects that would last for three days. Later, I went back and carefully read the label, which I should have done earlier. It
was labeled as containing maltodextrin and even had a “Phenylketonurics - contains phenylalanine” warning. Once again, I learned how valuable reading labels “carefully” is to someone like me. That’s life, I guess, but it sure seems wrong that products, like the one I tried, can be labeled “free of artificial sweeteners” when they are not.
Not many people are aware of maltodextrin’s side effects. Those with maltodextrin sensitivity are trying to spread the word. There is even a facebook page called “Maltodextrin Intolerance Awareness” at
As a rule of thumb, it is recommended that individuals with food allergies or Celiac disease avoid maltodextrin. Side effects may include:
  1. Diarrhea. One of the most common side effects is diarrhea. Those who are allergic to or sensitive to maltodextrin, or the base starch it is processed from, can easily get an upset stomach, followed by cramps, diarrhea, bloating and watery stool.
  2. Upset stomach. Another common side effect of maltodextrin is a general feeling of sickness or an upset stomach. 
  3. Vomiting. In rare cases, individuals who are sensitive to maltodextrin may begin to vomit after consuming the additive.  
  4. Hives or rashes Maltodextrin can cause hives or rashes in certain individuals. The body will react to an unwanted additive or allergy by producing histamine, which causes hives or rashes.
  5. Asthma. In rare instances, maltodextrin may cause asthma or breathing problems in those who are severely allergic or sensitive. Consult a doctor immediately if you are experiencing any difficulties with breathing or any asthmatic symptoms.
Shawarma wrap
"But I just can't let it get me down,
Cause this big old world keeps spinnin' around.
"

I guarantee that I will never let my guard down again on reading labels. It's just not worth being sick for three days.

While I was "sick," I really craved salty, well-seasoned foods, like a "Shawarma wrap" which is a Middle Eastern sandwich made with seasoned meat but in my case, seasoned tofu.

Ingredients:
  1. 1 cup shredded, peeled cucumber
  2. 1/4 cup soft silken tofu
  3. 2-3 T. tahini
  4. 2 T. lemon juice
  5. 1/2 tsp. sea salt divided
  6. 1 tsp. garlic powder
  7. 1 tsp. curry powder
  8. 1/2 tsp. ground black pepper
  9. 1 block extra firm tofu sliced into five lengthwise rectangles
  10. 1 T. olive oil
  11. 4 garbanzo bean flour pancakes (or tortilla or pita bread if tolerated)
  12. 1 medium tomato chopped
  13. 1 cucumber sliced
  14. 2+ cups of lettuce or mixed greens
Directions:
  1. Preheat a grill or grill pan.
  2. Blend shredded cucumber, soft tofu, tahini, lemon juice and 1/4 tsp. salt in a food processor or bowl.
  3. Combine garlic and curry powder, black pepper, 1/4 tsp. salt. Rub extra-firm tofu slices with the spice mixture.
  4. Grill the tofu slices in a grill pan drizzled with olive oil (or use your outdoor grill) just until grill marks form.
  5. To serve, place a garbanzo bean flour pancake on a piece of wax paper. Spread cucumber/tahini sauce on the garbanzo bean flour pancake and top with tofu, tomato and greens. Fold like a taco or roll like a wrap. Finish by wrapping the wax paper around your "shawarma" to keep things together.
To make Garbanzo Bean Flour pancakes:

  1. Mix one cup garbanzo bean flour with 1 cup water. Whisk to combine.
  2. Heat a cast-iron tortilla pan.
  3. To make a pancake, drizzle olive oil on the pan and add 2-3 T. of batter.
  4. Cook until the batter seems set before flipping to cook the other side. (Note: don't look for bubbles like regular pancakes.)
  5. Continue cooking additional pancakes in the same manner. Stack them on a plate but separate each with a piece of wax paper to keep them from sticking together.
  6. I find medium-sized pancakes work the best for this batter but you can experiment with making them larger.
  7. The pancakes store well in the fridge for 2-3 days if you have extras.


Sunday, February 19, 2012

Butternut squash fries with ginger tahini dipping sauce

Whispering Pines Yurt
Winter has never been my favorite season. I decided to make it more enjoyable by trying something new this winter. I rented a yurt operated by Idaho Parks and Recreation, for an overnight stay. The yurt adventure was a hit with everyone, including the snow pups, Misha and Nika.

View from the yurt deck


Ritalin Boy (husband) and I used to go winter backpacking, using a pup tent. By comparison, the yurt was like being in the Hilton. It was definitely a step up. We snowshoed in about 2.5 miles with our gear in either backpacks or sleds or in the case of Ritalin Boy, both. This was not without mishaps. Ritalin Boy purchased a $3 sled to pull and it kept flipping over whenever we hit a sloped section of trail. I guess you get what you pay for when it comes to gear.

Misha and Nika look out yurt window.


Snow buddies, Misha and Nika, were in the height of their glory. I think they wanted us to stay at the yurt indefinitely or at least, until the snow disappeared.

Open privy

The most unique part about the yurt was the open privy. There was a great view of the clear night sky if you had any business to conduct there late at night. The trail down there was a bit treacherous because of icy conditions. The overnight temperature was 5 degrees so you really needed to go to make the trip.

Nika and Brian inside the yurt

The yurt was well equipped with comfortable furnishings, wood stove, propane lanterns and cook stove. Nika, my food crazy malamute, wanted everyone's food for herself but alas, she had to deal with disappointment that some of the food we hauled in was for us. Misha did the honors of hauling in the pups' food.

Butternut squash fries with ginger tahini dipping sauce
We enjoyed our yurt stay so much we plan to repeat the experience in March. In the meantime, I am trying to decide if we should just take backpacking food again or try something more gourmet. The kitchen was well equipped with everything needed to do some more adventurous cooking.

My idea of packing along some sweet potato and granny smith apple slices, and diced butternut squash for snacking, really hit the spot. Dipping the snacks in sunbutter made the perfect combination. 

All this yummy snacking filled my head with more ideas for butternut squash. I had to try making some butternut squash fries as soon as I returned home.

Butternut squash fries with ginger tahini dipping sauce

Ingredients:
  1. 1 medium butternut squash
  2. olive oil
  3. sea salt
  4. pan spray
  5. 2 T. tahini
  6. 1/4 tsp. McCormick roasted ground ginger
  7. 1 medium carrot, peeled
  8. 1 tsp. agave syrup
  9. 1/4 cup water
Directions:
  1. Preheat oven to 425 degrees.
  2. Peel and slice butternut squash into fry shapes. Smaller fries work better.
  3. Toss fries with olive oil and sea salt.
  4. Spread on a large cookie sheet spayed with pan spray.
  5. Place in oven for about 30 minutes. Rotate the pan and flip fries after about 15 minutes.
  6. In the meantime, prepare dipping sauce by blending the tahini, water, carrot, ginger and sweetener in a food processor. Note: Extra dipping sauce makes a great salad dressing for greens or fruit; or consider making kale chips with the sauce.
Contributed to: http://www.dietdessertndogs.com/2012/02/16/wellness-weekend-february-16-20-2012/

    Thursday, August 4, 2011

    Sunbuttery zucchini noodles

    Misha "helps" me in the vegetable garden.
    Sunbuttery zucchini noodles
    Whenever my husky puppy, Misha, gets really quiet I know, if he is not asleep, that he is up to no good. The picture above shows one of those occasions. I took him out to the garden expecting him to do some exploring while I did some weeding. Silly me.

    He decided to "help" me while I was pulling weeds. When I turned around, there he was digging a huge trench where I had just planted seeds. Lucky for him, he is so cute. Otherwise he'd be in the "doghouse" every day.

    Despite Misha's digging in the garden, I am experiencing a bumper crop of zucchini and cucumbers. I used them to make a yummy meal of raw veggies topped with my version of Thai peanut sauce that substitutes sunbutter for peanut butter.

    Sunbuttery Zucchini Noodles
    (serves 2-4)

    Ingredients for the Sauce
    1. 1/3 cup sunbutter (unsweetened)
    2. 1/4+ cup water
    3. 1 T. sesame oil
    4. 2 T. aminos
    5. 1 T. lime juice
    6. salt and pepper
    7. Optional: pinch of stevia and 1 clove of garlic
    Directions:
    1. Put everything in a food processor and blend until smooth. Add additional water if mixture is too thick.
    2. Serve over zucchini ribbons piled with other veggies, cut into matchstick pieces. Use carrots, cucumber, jicama, radishes. Top with toasted sunflower seeds and sliced green onions. Optional: Serve sliced grilled chicken breast.
    This recipe and other healthy ones are linked to: http://www.dietdessertndogs.com/2011/08/04/wellness-weekend-august-4-8-2011

    Saturday, January 29, 2011

    Homemade sunbutter and pumpkin butter saves bucks

    Homemade sunbutter

    Homemade pumpkin butter
    Monday will be the day I get the results of my food sensitivity testing. I'm looking forward to uncovering something that has gone undetected in numerous elimination diets where you stop eating certain foods for a month or more, and then retest for reactions by gradually adding them back in.

    They did the food sensitivity test on me rather than the allergic resonse test. I have never had an allergic response to any foods but instead have food intolerances which are far more difficult to figure out because sometimes responses don't occur for three days. It seems weird to hope something shows up but yet it might shed light on why I get certain symptoms, like upset stomach and chronic muscle pain caused by trigger points.

    I'm hoping that the test doesn't show I have a problem with sunflower or pumpkin seeds because they are two of my very favorite foods. I have winced at the price but have purchased sunbutter and pumpkin butter for years. $6-8 for sunbutter and $10-12 for pumpkin butter recently inspired me to try making my own and see how much I could save.

    I purchased raw sunflower seeds for $1.70 a pound in bulk and figured I would need 2 1/2 cups to make a pound of sunbutter. That equates to $4.25 for seeds compared to $6.99 for sunbutter which I paid at my most recent purchase. I calculate a savings of about $2.70.

    Pumpkin seeds are a little more pricey, $3+. I haven't done the cost analysis on making my own pumpkin butter yet but I'll figure that out next time I purchase pumpkin seeds.

    To make sunflower or pumpkin butter:
    1. Begin by toasting one or two cups of seeds either in a skillet or baking sheet in low heat oven. I set the oven for 325 degrees and keep a close eye on the seeds.
    2. Note #1: don't skip the toasting step. This is key to getting the seeds to turn into a creamy butter.
    3. Note #2: The toastier the seeds the more intense the flavor.
    4. Cool the seeds slightly.
    5. Pour into your food processor and begin grinding. Gradually add in 2 or more tablespoons of grapeseed or other oil, and continue processing until you have a smooth paste.
    6. Add a few drops of liquid stevia if desired.
    That's all it takes to make some delicious sunbutter or pumpkin butter. It does take some time but if you eat a lot of the stuff it can save you some money.

    Friday, December 3, 2010

    Sunbutter dressing

    Snow has wrapped my world in a beautiful white blanket. It's amazing how fluffy snow can transform an ordinary landscape and make it something extraordinary.

    Sunbutter has a similar power when it comes to food. It can change a recipe into something delicious. One of my favorite uses for sunbutter is in my Sunbutter dressing. I eat a lot of salads and the dressing makes them most enjoyable.

    Sunbutter dressing

    Ingredients:

    1. 1/4 cup unsweetened, natural sunbutter
    2. 1/4 cup lime juice
    3. 1/8-1/4 cup water
    4. salt and pepper to taste
    5. 1-2 drops of liquid stevia
    6. 1/8 cup flaxseed oil
    7. 1 tsp. each chili powder and cumin
    8. 2 cloves garlic
    9. 1/4 cup fresh cilantro chopped

    Directions:

    1. Place all ingredients in a blender or food processor. Reserve 1/8 cup of water to add if the mixture is too thick.
    2. Blend until smooth and creamy. Add additional water if you want it thinner.
    3. Serve over salads, slaws, etc.
    4. Dressing keeps well in refrigerator for a week.